This guide will walk you through the steps to setup DDNS on a Cisco Wireless Router.
Step 1: Open up your favorite browser and go to the router’s default gateway address. This router uses a self-signed security certificate and you will need to confirm the exception.
• https://192.168.1.1 (Default Address)
Step 2: Login to the router (common default value listed below).
• Cisco RV110W Username: cisco and password: cisco. The password is case sensitive.
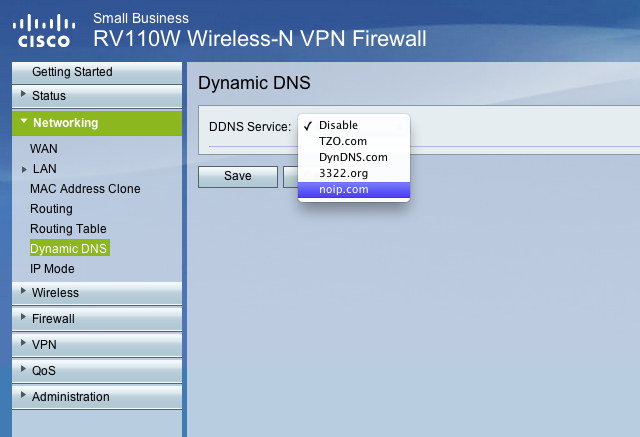
Step 3: Go to “Networking”, on the left hand side, then “Dynamic DNS”.
• DDNS Service: Select from the drop down menu “noip.com”

Cisco RV110W Router DDNS Provider dropdown
Step 4: Enter your account info.
• E-mail Address: Your email address you use to login to No-IP.com
• Password: The password you use to login to No-IP.com
• Verify Password: Your password again
• Hostname: The hostname you wish to update, under “Hosts/Redirects” in your No-IP.com account
Instead of using your No-IP account credentials, you can create and use DDNS Keys. They offer increased account security and better update client compatibility.

Cisco RV110W Router DDNS Settings
When you click “Test Configuration”, if everything is correct you will receive the message, “DNS is updated successfully”. Once the test is working properly “Save” the settings and your router will perform Dynamic DNS to your host.domain.com.