What is Port Forwarding?
Port forwarding is a method of routing connections over the internet to a device on a local network. By configuring port forwarding, you can enable a variety of services such as remote access to a media server, hosting a game server, or self-hosting a website.
Article Summary
- Log into your router using its default gateway address.
- Enter your router’s username and password.
- Navigate to the Port Forwarding / Virtual Server settings.
- Create a rule: name the device, select TCP/UDP, enter internal IP and port.
- Save/apply changes, then test the port with an external port checker tool.
Our Video Guide to Port Forwarding
Here’s a great video that explains the basics of port forwarding:
Five Steps to Set Up Port Forwarding
Please note that port forwarding is not a feature provided by No-IP.com and our support team can not guide you on this. The following guide was created to point you in the general direction. If you require further support than this, you may need to reach out to your router manufacturer or internet service provider.
Step 1: Login to Your Router
Login to your router via the default gateway address. (Follow the link for additional instructions on finding your default gateway address step.)
Step 2: Enter Router Username and Password
Enter the credentials for your router on its login page.
Please Note: The credentials for your router should be found on a sticker located underneath or behind your router. If not, you can try the most common credentials below.
Device Username Password
D-Link admin (leave blank)
Netgear admin password
Linksys admin admin
Asus admin admin
DrayTek admin admin
ZyXel admin 1234
TP-Link admin admin
TRENDnet admin admin
Belkin admin (leave blank)
Step 3: Locate Port Forwarding Settings
Next, locate the port forwarding settings. Typically this will be under Advanced and then Port Forwarding or Virtual Server.
Step 4: Name Your Device
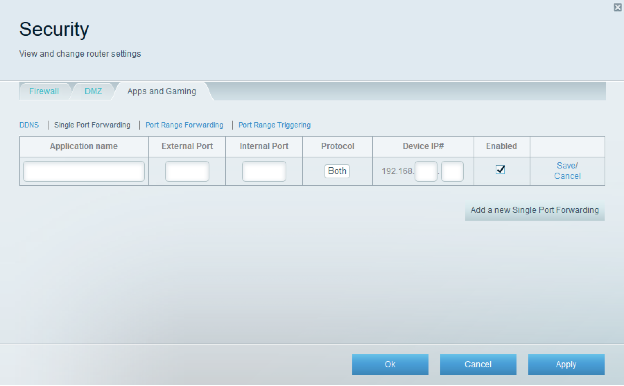
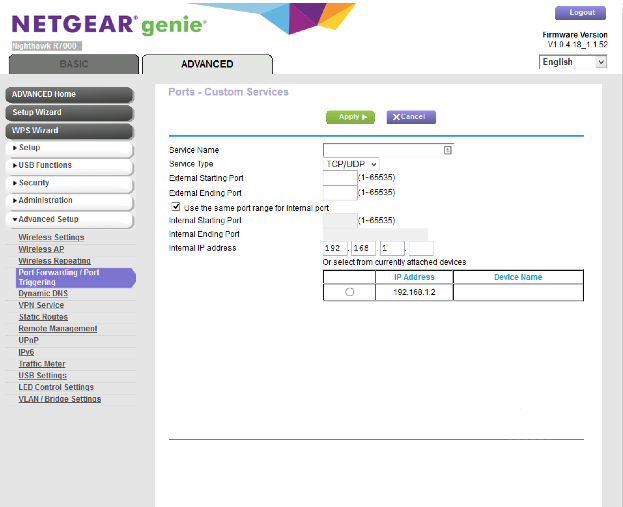
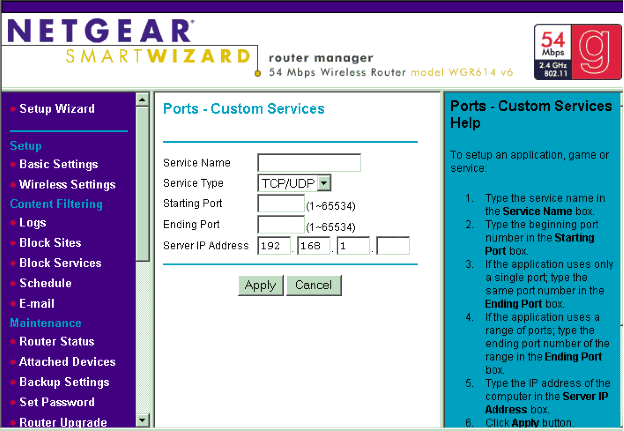
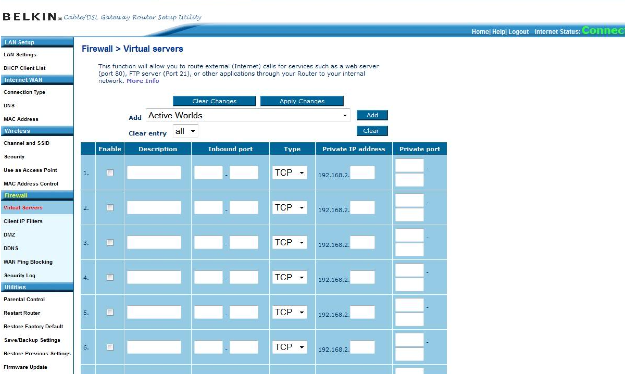
On the Port Forwarding page, you will be prompted to enter in a custom name for your device, usually the device you’re trying to reach like a security camera or NVR. Then you’ll enter the desired port you are forwarding in the port field. Select “TCP/UDP” under Protocol or “Both” if you are unsure of which protocol you are using. Next, enter the internal IP address of the device you are port forwarding to and click “Apply” or “Save” to store the changes.
Step 5: Confirm That Your Port Forwarding is Working
Finally, check to see if the port is open by going to www.portchecktool.com. Enter the port number you have forwarded and click Check Your Port. If the port is open, a report should come back stating so.
You should now be able to connect to your device via a web browser. Simply enter your hostname followed by the port number into the address bar. For example http://hostname.ddns.net:8000.
Please Note: If you are using a mobile application, you will need to use just your hostname to connect. The application should already specify the port when attempting to connect.
Port Forwarding Examples on Different Routers
Below you will see interfaces from the 4 popular manufacturers: Linksys, Netgear, Belkin, and Asus. Be aware that your router may display a different interface. If you have any questions or are unsure what to do, we recommend finding a guide that provides more information.
Linksys

NETGEAR
Belkin

ASUS
