This guide is for our service Alternate Port SMTP. If you have our No-IP Managed Mail POP3/IMAP services, please see this guide: https://www.noip.com/support/knowledgebase/emails-bouncing/
Nowadays, it is becoming harder to host your own email server. Due to an ever growing volume of spam/scam emails, it is increasingly common to have your emails return as undelivered or go directly to your recipient’s’ junk or spam box.
Google and other mail providers have been increasing their security requirements and are rejecting more emails. Fortunately, it is easy to mitigate this situation by adding mail records to your domain.
Let’s get started. The three mail records we will cover are SPF, DKIM, and DMARC.
SPF Records
SPF (Sender Policy Framework) is a way to tell mail exchanges which IP addresses are allowed to send email from your domain. Without it, anyone can potentially use your domain to send email.
We provide an SPF Record so you don’t have to create it yourself:
v=spf1 include:no-ip.com -all
If your DNS is provided by No-IP, you can add this SPF record yourself on your No-IP dashboard by going to My Services > DNS Records > Modify and click the TXT button. In the Data field paste the SPF record, and click Add. It should look like this:

For in-depth information on SPF records, please see the following links:
Help prevent spoofing and spam with SPF
https://support.google.com/a/answer/33786?hl=en&ref_topic=10685331
Define your SPF record—Advanced setup
https://support.google.com/a/answer/10683907
DKIM Records
A DKIM record is another important piece of email verification. DKIM (Domain Keys Identified Mail) is a method for checking to see if an email is allowed to be sent from the server. By adding a digital signature to every email you send, the recipient’s mailbox will automatically check the email to make sure it is legitimate. Any email that doesn’t have that signature will be rejected, or placed in your spam folder.
Creating a DKIM record is a bit more complicated than an SPF record because it is personalized for your configuration, and you need to add a file to your email server to complete the process.
Note: If possible, we recommend having your IT department or System Administrator help with this process.
Creating your DKIM Record
We like to use Easy DMARC https://easydmarc.com/tools/dkim-record-generator
First, enter your domain name, like example.com. This will be used to generate the cryptographic keys for this record, so it needs to be the same domain your email is using. If your mail service is using mail.example.com, you need to enter that in this field.
In the Selector field, enter s1.
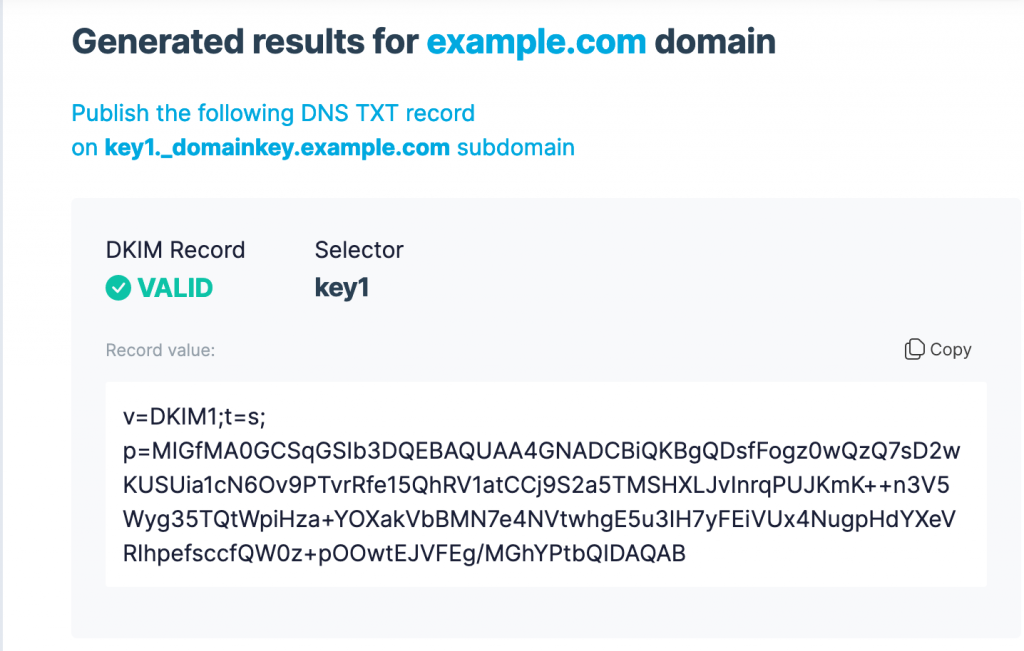
After you click Generate, you should see some output including the Public, Private keys and selector information.

Copy the DNS TXT record provided and add it to your DNS records on your No-IP account. You can do this by Modifying your Record on My Services > DNS Records > Modify > TXT button under Advanced Records.
On the DNS TXT Record page, paste the Selector as provided by the DKIM Generator. Like this: s1._domainkey -all
Make sure only the selector is in the field, not your domain, as it will be automatically added.

Next paste the Record Value provided by the DKIM Generator.
Make sure there are no quotes in your record.
Click Add to complete this step.
Private Key
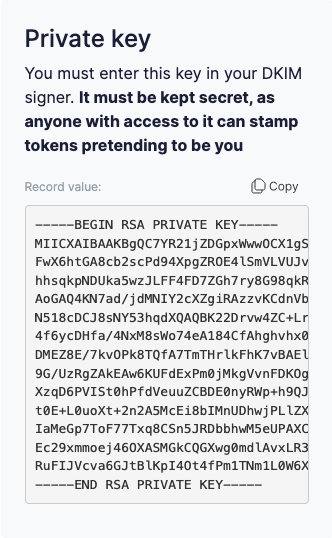
Lastly, copy the Private Key and install it on your mail server. If you are unsure how to do this, consult your mail server software’s documentation or online forums for more information.
Please note, we cannot help you with this step as it involves your own hardware and software. Your private key should look something like this:
For in-depth information on DKIM Records, please see the following link:
https://support.google.com/a/answer/174124
DMARC Records
Domain-based Message Authentication, Reporting & Conformance or DMARC is a little different in that it ties SPF and DKIM records together, by telling the server what to do if an email fails one or both of the SPF or DKIM checks.
Creating your DMARC Record
You will need to use EasyDMARC to generate a DMARC record. https://easydmarc.com/tools/dmarc-record-generator
It is important to read the descriptions on this page as it will define how the receiving server handles the authentication checks. These settings will highly depend on your use case, so we will not go into them here.

One thing to consider is the Policy Type. This will define what happens when an email sent from your domain is perceived as illegitimate. With the Quarantine option, emails in this category will go into the users Spam mailbox. Reject will have the emails rejected altogether.
We highly recommend doing more research on this topic because a misconfiguration here can potentially prevent legitimate emails from being delivered. If you have an IT Specialist or Department at your organization, we recommend reaching out to them before making any of these changes.
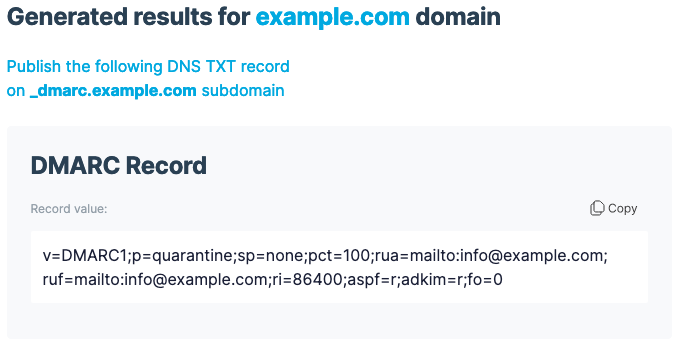
Once you click Generate, EasyDMARC will provide you with another TXT record.
Add this TXT record the same way as the other records using the selector provided (in our example it would be: _dmarc.example.com) You will add that record from My Services > DNS Records > Modify > TXT.
For in-depth information on DMARC records, please see the following links:
https://dmarc.org/wiki/FAQ#General_Questions
https://support.google.com/a/answer/2466580?hl=en&ref_topic=2759254
These measures should help with ensuring your emails are delivered when sending email using your mail server. If after completing this process you are still having issues, feel free to contact our No-IP support team by creating a ticket here: Create Support Request or emailing us at support@noip.com


